
Lockdown Hobby Part 4: Back to Base-ics
Welcome, welcome and thrice welcome, to this fourth part in my Back to Basics Hobby Trilogy.
Hang on, is that right? Well, yes, I had rather planned on the series being a nice concise and pleasing triad. Assembly, Priming, and Painting. It was only as I finished the last of these, that I realised that I had neglected a small but essential part of the process. How remiss of me!
So here we are with the FINAL (honest) part of my Back to Basics trilogy Quadrilogy: Basing.
Having followed my guides (and Al’s Top Tips) thus far, you will hopefully have a fully assembled and now painted miniature. But what about the base?
Although you could of course always just leave it as bare plastic (after all the primary role of the base is to stop the miniature from toppling unceremoniously to the tabletop, and it will fulfil this role whether embellished or not), you would be missing an opportunity.
The humble base. It keeps your miniatures upright. Good going, base!
You see a base can be so much more than just the thing that your miniature stands on. It can be a chance to add narrative to the piece; extra details that tell a story. Indeed, a finely crafted base can even make the difference in a painting competition. In the instance of two equally well painted models, a well considered and executed base can swing the judge’s decision in an entry’s favour. Quite simply put, it's pretty important and I am ashamed at myself for not considering it before this point!
Bases incorporate two very simple elements. You have the nice big flat surface on top that will encompass the very ground beneath your miniature’s feet/claws, and you have the rim of the base itself. First off we are going to look at the former.
Part 1: Staying on top of things.
Adding Context(ure)
The very simplest way to base your model would be to use some textured paint. Citadel, amongst others, make a range of textured paints perfect for this. For my Space Marines I painted recently, I chose Agrellan Earth: a paint that provides the effect of dry cracked earth. One thing to consider when using this paint is that with the cracked effect it provides; the base will show through underneath. Therefore I would recommend applying a coat of a similar colour (such as Baneblade Brown in this instance) beforehand.

Simple but effective, Agrellan Earth with a tuft and a genestealer skull for decoration. Weathering powder on the feet ties the model into the base (not done this stage on the Scout yet)
If you don’t want cracked earth, you can use one of the other available options. My Adeptus Titanticus forces stride across ruined and flattened woodland, behemoth footfalls squelching into mud and mulch. I largely created this effect with Stirland Mud. Another technical paint from Citadel which gives a great effect of muddy earth. You could even lay a coat of PVA glue or varnish over it to make it look even more wet and sodden.
There are an abundance of textured paints available from lots of different manufacturers. So why not have a look and see if inspiration strikes you?
Flock it up
As an alternative to textured paint, you can use the time-honoured tradition of PVA glue and flock.
Hang on, what ‘flock’ are you on about? Well, put simply it’s anything you scatter over the base to provide the illusion of a surface. Sand for a desert, green pre-bought flock for a grassy field, indeed there are flocks of myriad colour and texture available that could represent any surface conceivable!
Whichever you choose though, the premise is the same. Apply PVA glue to the base (taking care not to get it on the miniature) and then just dip the whole base in the flock and make sure that the top is all covered. Take it out and shake it gently back over the container, so as not to waste excess. Worry not if stray PVA has caused the flock to go on the rim of the base, this can be wiped away with little trouble.

That’s a lot of Flock.
Now with most flocks - they will stay on the base quite easily, but sand is quite heavy so a coat of watered down PVA should be applied liberally to ‘seal’ the base and prevent the sand from falling off.
That’s the major two ways you can base your miniatures, but it’s far from the end of our dalliance with the top of the base. For a start, you can combine the methods - a little flock over mud or sand to represent patches of tundra grass, or perhaps freshly fallen snow.
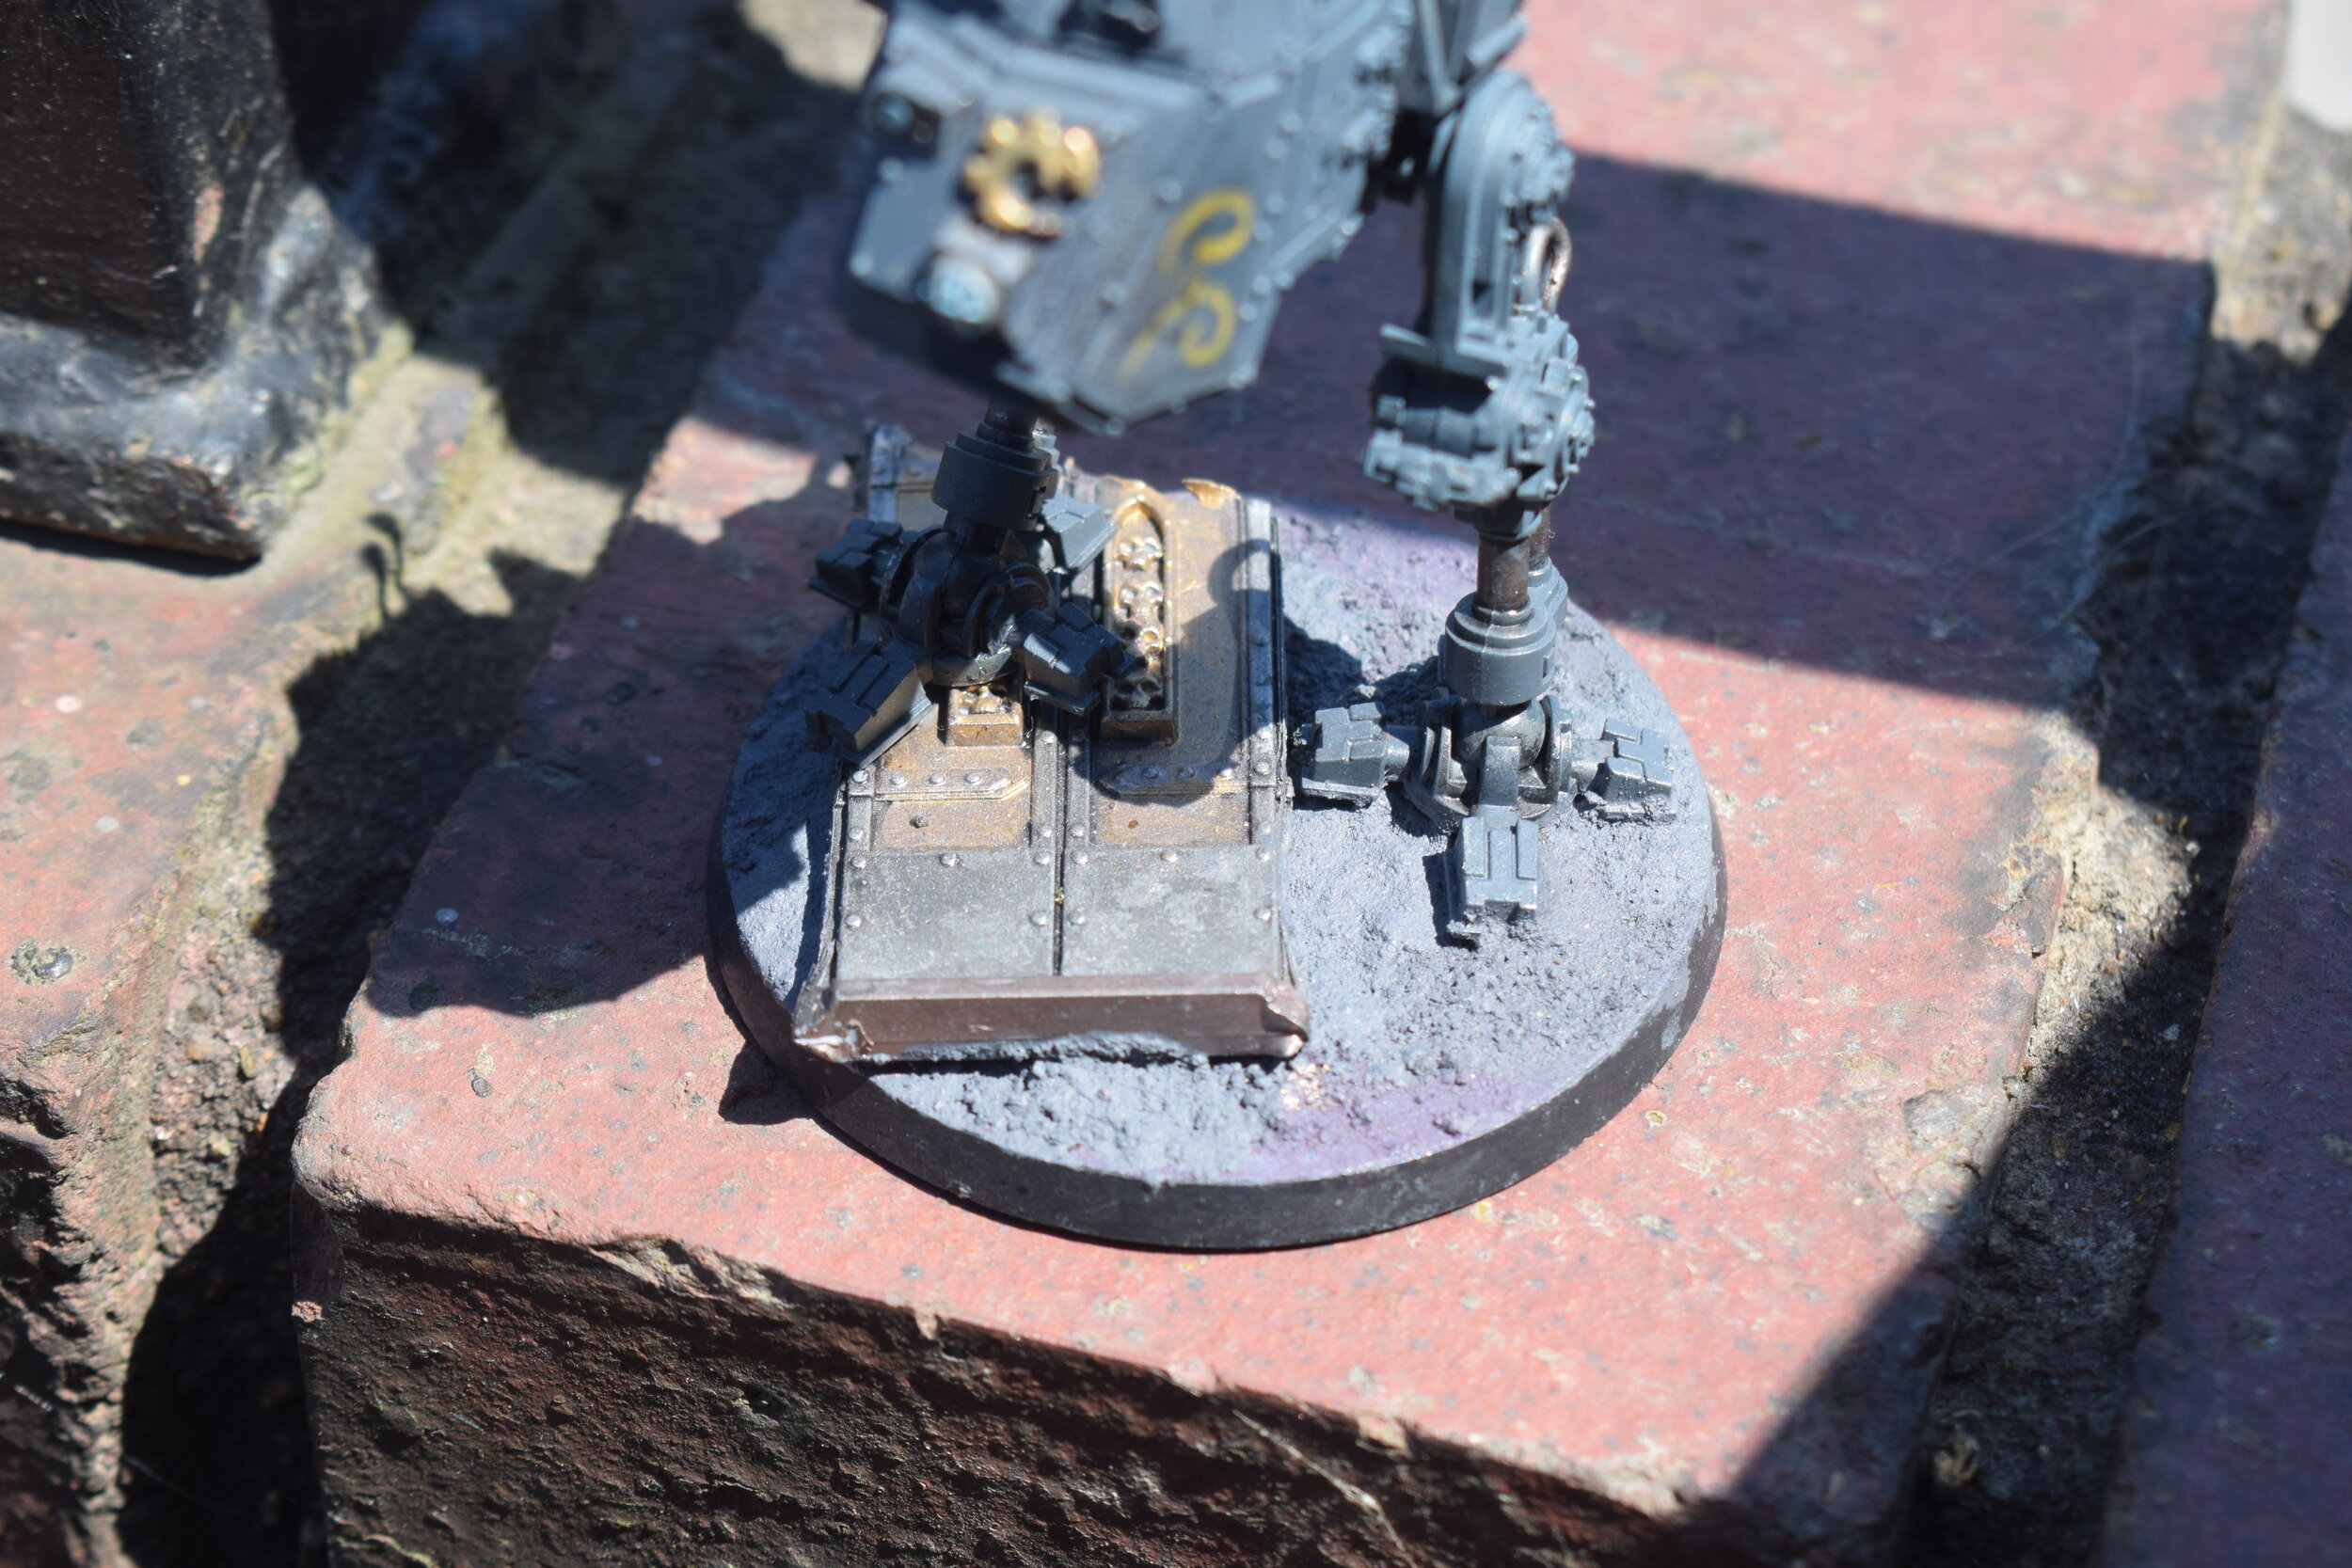
Another half finished mini (actually going through a REPAINT) the door on this base adds a bit of interest and the Sentinel looks really cool standing on it so it enhances the miniature too.
And then we can look at embellishments. Like I said, you can use your base to tell a story. Admittedly you may not want to go to this effort on ALL your bases, but it can be a great way of adding a narrative touch to a character, or walker base where you have the space to allow such indulgences. I myself have a penchant for a skull here or there and the Citadel Skull set has about 300 of them, should keep me going for a while. You could add a spare bit from one of a regular opponent's armies painted in his colours for a subtle bit of psychological warfare. After all:
“It is the unemotional, reserved, calm, detached warrior who wins, not the hothead seeking vengeance and not the ambitious seeker of fortune.”
― Sun Tzu, The Art of War
(this can also work great for objectives - taunt your foe by making a captive for him to reclaim. Remember it’s all in fun!)
There are also less, provocative things you can include on bases like small rocks or tufts. Indeed, with a little foresight, you can build mighty structures on which to display your very finest models. I’ll not get into such here, as this is meant to be a basic guide but should you wish for me to do an article on advanced basing, be sure to let us know!
One last thing before we get to the final part of basing (the rim), there are also a wide variety of precast bases available. Though the treatment of them would be more like painting (as per part 3) than basing they certainly warrant mention here. Though they are a more expensive option, they will allow you to achieve spectacular results for relatively little effort.
Part 2: Specific Rim
The rim of the base might seem even more redundant than the top. After all, there’s not much you can do with it right? WRONG!
For a start - what colour you use can have a big effect on the top: complementing it or clashing with it depending on what colour you use. This cranky old gamer can remember back in the day when there was only one way to base your models. Goblin Green Rim and sand covered with Goblin Green paint and dry brushed Sunburst Yellow. Aaah those were the days, back then you needed a degree in mathematics and several strange shaped dice to even play! Not to mention the vehicle location damage tables, why I remember the time when that Space Marine Predator flipped and…

A red base rim denotes the ‘elite’ Storm Troopers. I say ‘elite’, they still aren’t good shots.
Ahem, sorry. Where were we? Aah yes, Base Rims. Not only are you free to choose a colour to complement the top or mark out a special unit. You can also use the space to mark out the name of a particularly important individual or in a game where individuals are important, like Necromunda or Blood Bowl, the name or number of that figure so that you can keep track on the battlefield. Playing a campaign? How about Kill Markings? Remember, it’s an empty canvas upon which to express yourself and make your figure or army stand out from the crowd.
Once you are happy with the base, I would recommend hitting it, along with the rest of the model, with a coat of spray varnish to protect it from the rigours of gaming. After all, you’ve put a lot of effort into it, you wouldn’t want it getting chipped or damaged! I remember the days when people were afraid to let me look at their painted models (they were all metal in those days and chipped a lot easier) because of my infamously abrasive fingers… Njal Stormcaller, that was a bad one, way back in ‘97 or was it 98..?
******
Right, we seem to have lost Allen to the mists of nostalgia. We hope that these blogs have been useful to you. Don’t forget, if you have any requests or feedback let us know and’ we’ll poke him with a stick till he comes back to us.
Stay safe and keep painting and gaming!

